This is a sponsored post by Anna Gibson, owner of AKG Design Studio and an award-winning, certified kitchen and bathroom designer. AKG Design Studio is a boutique design firm specializing in kitchen, bathroom designs and cabinetry sales. Contact Anna at 571-989-2541 or [email protected], and follow her work on Houzz; Pinterest; Facebook and Twitter.
Reston real estate was booming this summer, so chances are that you are new to area. So, welcome to Reston!
Maybe you moved from far away or just crossed the river. Either way, this is your new home and you are trying to settle in.
In a survey conducted by The Harris Poll for Redfin, as many as one in four homeowners said they regretted purchasing their current home. But you are already here, somewhere between the wineries and monuments, and you need to make the place feel like home.
Whether it is a brand-new construction or new to you, you want to feel at home: the one place that everything is familiar, comfy and fits your lifestyle. Here are a few easy projects to make you feel right at home.
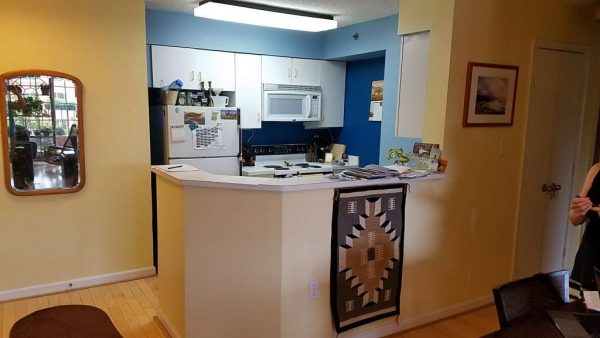
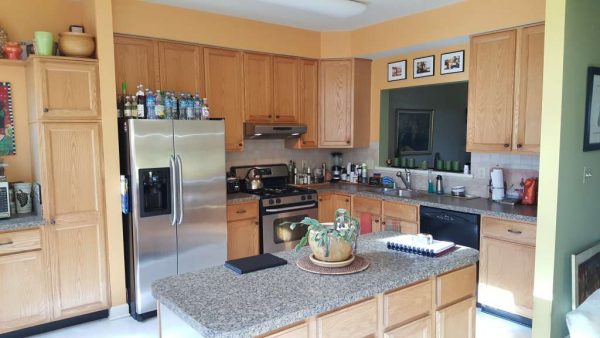
PAINT: Chances are, the previous homeowners left their mark with some crazy colors that do not fit your style, or the place was painted what I call “Realtor white” — the basic beige.
Paint is an easy way to make the place you own, and you don’t even need to reinvent the wheel. If you have wall colors/color schemes that you loved and that worked in your old house, consider repeating them. You liked them in the first place, so why not use familiar elements to help reduce anxiety in a new space.
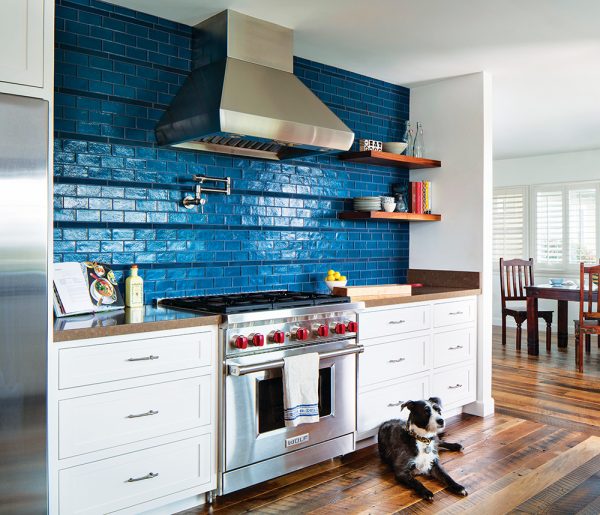
Remember to leave some room for that “fresh start,” and try some new colors! Bright colors work well in the kitchen, recalling fresh produce and stimulating the appetite. Make sure to check out the Reston Farmers Market at Lake Anne Plaza for fresh veggies and color inspiration.
GET ORGANIZED: Now is the perfect time to get a handle on your kitchen storage. Hopefully, you decluttered before packing. But if not, this is the perfect time.
Walk through your new kitchen and set “working stations” that fit your lifestyle — for example, a main cooking area, coffee station, kids’ snack station or even a cocktail station. Now you can unpack according to those stations.
Organize items in clear boxes so you can see clearly what’s in them and ease of pulling out. Checkout Ayers Variety & Hardware in Arlington for home gadgets.
PLANTS AND FLOWERS: It is well known that the green colors are good for relaxation. An easy way to bring a pop of green into your home are plants and flowers. They bring bright color for just a few dollars.
Plants are also known to help clean the air, and the smell of fresh flowers will cheer you up! How about the front yard?
If you have room for some personal touch, spruce it up. And don’t forget an herb garden for the kitchen. Nothing like fresh herbs with those organic tomatoes from Nell’s Produce market in Alexandria.
GET PERSONAL: How about a chalkboard? Just a small investment and an easy afternoon DIY and you can convert a boring wall in the kitchen to the family communication command center.
You can leave fun notes, write to-do lists, plan weekly menus and keep track of other reminders. Plaza Artists Materials & Picture Framing in Fairfax will have all your decorative DIY needs for great projects.
And if all else fails, bake some cookies! There is nothing that says home like the scent of fresh-baked cookies.
Invite the neighbors! They will be happy to know there is a new baker in town.
This is a sponsored post by Anna Gibson, owner of AKG Design Studio and an award-winning, certified kitchen and bathroom designer. AKG Design Studio is a boutique design firm specializing in kitchen, bathroom designs and cabinetry sales. Contact Anna at 571-989-2541 or [email protected], and follow her work on Houzz; Pinterest; Facebook and Twitter.
Colors are everywhere — clothing, cars, high-tech and, of course, your home!
From wall colors to furniture, it creates the atmosphere that changes a place from a house to a home. It’s a powerful design tool that can make the rooms in your house feel more homely with all the range of emotions from calm to dramatic, from cheerful to smart, warmth to cool and even some surprises or unexpected colors. At the same time, color also affects how we see the space, size-wise. Color can make a small room feel larger, or a spacious one to feel intimate.
Since colors are processed in the brain, we each see colors differently. According to www.colorpsychology.org: “The eye and brain can perceive more variation in warm colors than the cool ranges. The reason for this is that two-thirds of the eye’s cones interpret the longer wavelengths of lights such as reds, yellows and oranges.” This makes selecting colors a tedious and sometimes frustrating task, since there are so many colors and shades to choose from, and we can pick the differences between them.
Nonetheless, each color has a different emotional impact on us and may work in different spaces in our house. For example:
Purple: there are many researchers that show that purple has a calming effect over our mind and body, so this would be a perfect color for a bedroom to help induce sleep or for a mediation room. Be careful while selecting the right purple, as vibrant shades of purple can be stimulating and make you irritable. A great way to use purple is an accent wall in the bedroom with warm shades of lavender, or a deep purple as a backdrop for art in the family room.
White: Many people love the latest trend of white kitchens; the reason being the impact of white on our emotions. White is considered to be the color of purity, perfection and cleanliness, which makes it a great color for kitchens and bathrooms. What is better than starting your day with pure thoughts and clear energy? On the other side of the spectrum, white can be a non-committal and cold color. When you can’t make a decision, people defer to white. So whichever room you use it in, make sure to add an accent color or colors to bring energy and warmth to the room.
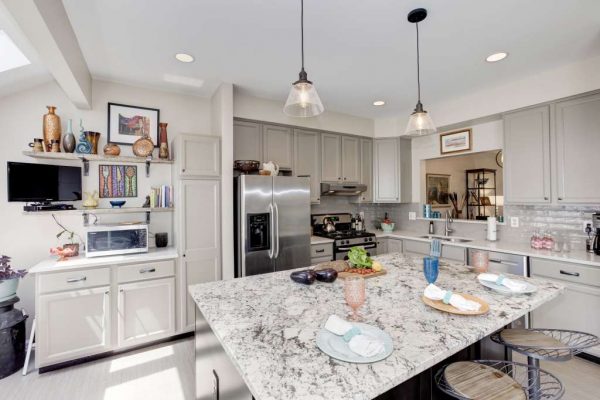
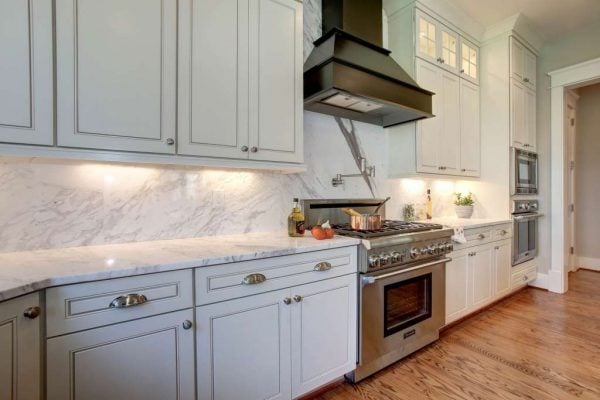
Gray: Gone are the days of beige. Shades of gray have taken over the interior design. While some find gray to be murky and depressing, most find it a great backdrop to other colors, making it the perfect new neutral color. The fun with gray is that you can create cold or warm variations that will work great with any other colors. Use gray to create a calming effect to a bright piece of furniture, like a deep purple couch. Add a bit of gray to the white, to create a warmer look to the room. In your kitchen, cold grays coupled with cool lighting (4100 Kelvin) will give a modern and slick look, while warm grays with warm lighting will give a cozy effect to the space.
Feeling bold and love the dramatic look for your lifestyle? Need some of the “wow” effect? Then go to the strong colors such as deep blues, black and purples. For a softer look, go with soft reds, oranges and soft yellow. Every color you select can be hot or cold, based on the depths of the paint. Just be careful with blue. They say that we see blue as an appetite suppressant, due to how few of our natural food sources are blue and the many toxic things that are shades of blue.
This week, we need your help!
We are updating how we communicate on social media. But before we put into place all of our team’s great ideas, we need to know we are on the right track. That is where you come in.
Could you take a moment to take my social media survey? It will only take you 5-7 minutes. You will be entered into a drawing to win a Ninja Master Prep Professional (QB1004) valued at $49.99. I will pull the winner Aug. 31.
This is a sponsored post by Anna Gibson, owner of AKG Design Studio and an award-winning, certified kitchen and bathroom designer. AKG Design Studio is a boutique design firm specializing in kitchen, bathroom designs and cabinetry sales. Contact Anna at 571-989-2541 or [email protected], and follow her work on Houzz; Pinterest; Facebook and Twitter.
You spend most of your day here, from breakfast to dinner and lots of snacks in between. Lately, you don’t like hanging out there that much — something doesn’t seem quite right with the most important room in your house.
Is it time to remodel your kitchen? Here are seven signs that you need to think about getting a fresh start with your favorite room in the house.
- Tilt cabinets are not a design style! When we talk about open shelving, we don’t mean missing doors or tilted cabinets. Broken and missing cabinets can also be downright hazardous to you and your family. And really, no one wants to see that overflowing spice cabinet every time they walk into the kitchen, reminding you that once upon a time there was a door on this cabinet. Or the drawer that you now have a blue mark from trying to close it to hard and hitting that other side. It’s time to let it go!
- New found storage? Just kidding — it’s the stove! How many burners are working on your range? Is that a new family sport, waiting to see which burner stops working next? Or maybe you are like my friend (whom I shall not name) who uses her stove for storage since the door is broken, so no cookie for you! Aging appliances are not only a hassle since you can’t properly cook. They usually consume much more energy because they are old, inefficient and most likely work twice as hard as a new appliance.
- It’s a one-man show! Many of the older kitchen spaces and layout didn’t really consider our modern lifestyle of cooking as a family, spending time with friends and a spot to feed the dog. Most outdated kitchens are enclosed with three, sometimes four, walls and lots of doors. If you must yell at everyone to leave the kitchen while you cook, it’s time to knockdown a wall or two and expand that space to fit your lifestyle.
- Do you feel like Cinderella? Do you scrub your floor four times a day, or did you just give up? Just like the cabinets, your floors take a daily beating of foot traffic, dropped dishes and spilled food. At some point, no matter what materials they are made of, they will succumb to wear and tear. Floors like hardwood can be refinished, and even patched, if you are changing the layout. Other floors, like tile, will need to be replaced.
- Turkey time? Not in my house! Do you avoid inviting friends and family because you are embarrassed of your kitchen? Do you they think you can’t cook, when really your oven is broken? It’s time to bring your kitchen up to date so you can enjoy hosting in style and show off your enchilada-making skills.
- No room for the car! Did you convert the garage to the kitchen storage? Maybe you are a budding master chef or just like kitchen gadgets? We all collect dishes and small appliances over the years. Yes, some may have met their demise and just need to hit the recycling bin, but others you still need and use, but your kitchen has other ideas. If you are like me and believe the crock pot belongs in the kitchen, it’s a sure sign that you need a new kitchen!
- Never ask a kitchen its age! An old kitchen can bring down your home’s value by simply looking its age. Realtors often say that the kitchen sells the house, and it will help to sell it fast. A successful kitchen remodel is one that you can enjoy for years to come, yet it will look great when the time comes for you to sell. Quality products, a great design and an experienced contractor can make this happen.
How many signs is your kitchen showing? Share your tired kitchen in the comments below.
This is a sponsored post by Anna Gibson, owner of AKG Design Studio and an award-winning, certified kitchen and bathroom designer. AKG Design Studio is a boutique design firm specializing in kitchen, bathroom designs and cabinetry sales. Contact Anna at 571-989-2541 or [email protected], and follow her work on Houzz; Pinterest; Facebook and Twitter.
Summer tends to be the time when people buy, sell and really move, a lot. Some will move to bigger homes with lots more space to spread the family and stuff around, and some will select to downsize.
People downsize for many reasons, family, financial and age. In all those cases, we are moving our family and changing our lifestyle, which is never easy — and with smaller space, the challenge is even greater. Here are a few ideas on how to deal with your space before and after the move.
BEFORE YOU MOVE
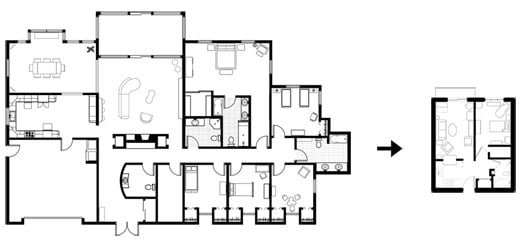
Start early and plan: Most of us don’t decide on downsizing at the last minute. Finding a new place will take time, and of course selling the old one just as long. While you are searching, this is a good time to start planning. Start thinking about how small you want to go, will you be moving from a five-bedroom to two? Who will be moving with you? Do you have family members that are not planning to move with you, what will you do with their stuff? Make plans to hold an estate sale or donate the items you don’t want or need to take with you. If you already know or have found a place to live, find a floor plan as soon as you can, so you can start figuring out what furniture will fit into the space, and what needs to go.
Make lists: Go room by room and check what you have and what you really need and want to keep. Some things will be keepsakes and some just need to be trashed. You can make an inventory list by rooms or master lists such as furniture/clothing/memorabilia and keepsake. Have two columns: Keep and Gone. Make sure your Gone list is bigger than the Keep!
Ditch the duplicates and sort, sort and sort!: According to top fashion advisors, clothing items you haven’t worm in two seasons must go. Don’t sweat over the extra T-shirt or the dress you haven’t worn in three years, lose it! Check your kitchen — lots of gadgets! Are you really using them? Will you need them in your new lifestyle? How many mixing bowls do you really need?
AFTER YOU MOVE
Multi-function: Furniture and appliances that have multi functions are the key! Look into upgrading appliances in order to create a power house of cooking with fewer items. There are plenty of multi-function ovens such as the Miele Combi-Steam oven. Not only is it a convection oven, it has speed cooking and steam! You get three appliances in one, taking up one spot in a small kitchen. Small appliances such as the Instantpot can replace a steamer, rice cooker and a crock pot, while adding the power of pressure cooking.
Think of furniture such as a sleeper sofa for the occasional guest, or a coffee table with storage, for all your family room needs.
While looking for your new home, look for a room that can have multi functions. If you need office space or a spot for yoga, can this room be big enough to add a day bed and can it be used as a guest room? Skip the formal dining room, most people don’t use them, and consider converting it into an office, or a den — add glass doors to create a quiet space.
If you are ready to start decluttering (even if you are not moving or downsizing) make sure to join Buy Nothing Reston and re-gift you treasure to your neighbors.
Have you downsized lately? Have any other ideas to share? Please post below, we would love to hear from you.
This is a sponsored post by Anna Gibson, owner of AKG Design Studio and an award-winning, certified kitchen and bathroom designer. AKG Design Studio is a boutique design firm specializing in kitchen, bathroom designs and cabinetry sales. Contact Anna at 571-989-2541 or [email protected], and follow her work on Houzz; Pinterest; Facebook and Twitter.
School is finally over! And the kids are home for the summer, which means there are craft papers and art supplies flying all around the house! Yes, you did that trip to the art supply store to get all the googly eyes and glitter paper to keep the kids away from the TV for just few hours. So, what do you with all this now?
This week we are catching up with guest blogger Kim Creigh, owner of Creigh~ations, an Etsy shop that customizes in educational craft kits, birthday party decorations and cute gifts. She is the crafty hostess of the Creigh~ative Connection, a free Facebook group that helps moms connect with their children through creativity. She’s here this week to give us her expert tips on how to organize a craft room.
Can you thrive in a messy space?
Have you ever heard that a messy desk actually means you’re more creative?! No? Well, don’t burst my bubble because I’ve read articles that support this and I just chalk my scrap-paper-covered desk up to my creativity! What IS the best way to organize that space into something more orderly? After pinning lots of craft room organization, reading about it and then applying it to my own craft space, I’m going to share my top tips to organizing that craft room! (Some of the links provided are affiliate links in this article. I only recommend what I use and what works!)
What is the biggest problem in craft storage?
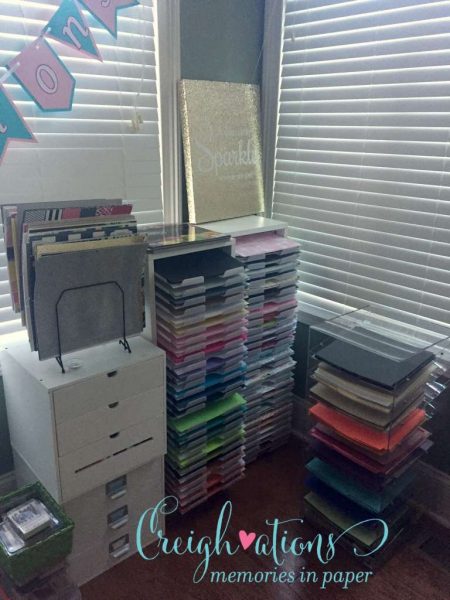
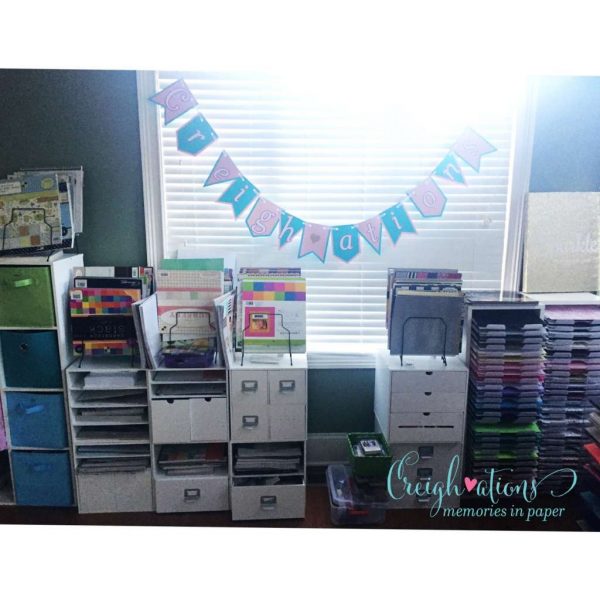
If you’re a serious crafter, you are also probably a paper hoarder. This is the biggest issue in a craft room, in my opinion. There are so many possibilities, but if you are a *true* paper hoarder, you need to invest in some paper storage options. These 12×12 shelves are key. Yes, it may look like a craft store, but these paper holders are the way to go! There’s nothing worse than grabbing a piece of pretty cardstock and seeing a bent corner because of how it was stored!
And now what?
Once you organize your paper, you are on the way to an organized craft room! I would also recommend having a bin for scraps. If you are super organized, you could even color code these bins, but I personally simply have a large bin that I throw all of my scraps into, and this seems to work.
I would highly recommend keeping anything you use on a daily basis within arm’s reach on your desk. For me, this includes my computer, my Cricut Cricut mats + tools, scissors, adhesive and whatever paper I need for my current project.
Decide what you use the most, position it close to you and then figure out a paper storage system that works for you. Organize your other craft tools based on importance and also how much physical space you have. You are on your way to an organized, happy craft space!
Do YOU have any craft room organization tips? Leave a comment below!
This is a sponsored post by Anna Gibson, owner of AKG Design Studio and an award-winning, certified kitchen and bathroom designer. AKG Design Studio is a boutique design firm specializing in kitchen, bathroom designs and cabinetry sales. Contact Anna at 571-989-2541 or [email protected], and follow her work on Houzz; Pinterest; Facebook and Twitter.
Summer is here and the season of treating friends, family and the kids is upon us. There will be plenty of family visiting from out of town and kids running around, so here are a few appliances that will help you get through it all!
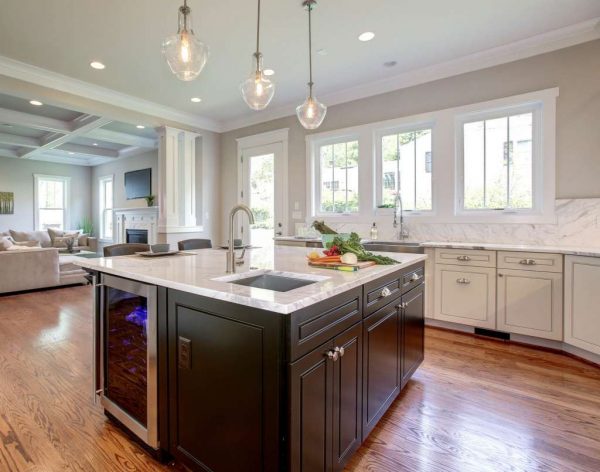
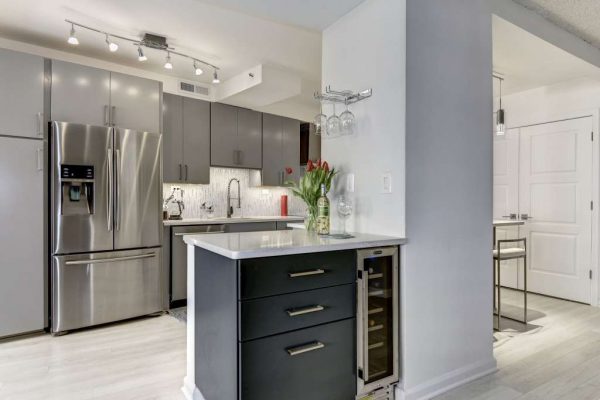
Beverage Center: Wine cooler or a mixed-use under counter beverage centers are great to clear space in your main fridge and lets guest and kids serve themselves from wine to soda, you can store all your drinks in there. They can be free-standing or built-in, based on your layout and space. Great spots for these are in the island, away from your prep area, or maybe convert that desk area (the empty space that no one uses) to the beverage center. It is usually far enough from your prep zone, yet still in the kitchen for easy access.
Ice maker: We all run out ice at some point! If you barbecue outside or are just hosting a cocktail party, there is always that call for extra ice. Most ice makers are made to be built into your cabinet space, kitchen/bar, but there are a few new options for countertops as well. You can even keep them outside by the grill!
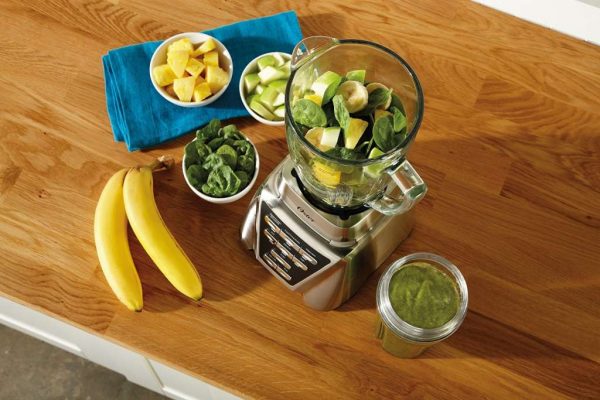
Blender: Blenders allow you to make drinks for any type of party. These are ideal for mixing cocktails, non-alcoholic mocktails, milkshakes and just about any other type of drink you can imagine. Look for models that come with a frontal spout for easy serving. If you’re going to be mixing drinks with a lot of ice in them, look for a blender or drink maker with a pulse or ice-crushing function for easy blending.
Ice cream machine: You can go basic or go big with the Margaritaville brand. Since they are portable, you can use them inside or out. They even have models that will work with your car charger. So party wherever you are!
Crock pot and Instant pot: Just toss all your ingredients in and off you go the pool while dinner is cooking and no extra heat from running the oven. You can even leave it plugged in to keep the food warm while you are serving or self-serve at your party. And it’s easy to store.
There are few models out there made for parties with smaller portions for added variety (up to three different dishes).
Pizza Maker: Everyone loves pizza! While you can invest in a large built-in pizza stove in your kitchen or backyard, the awesome Breville Crispy Crust Pizza Maker sits on your countertop and lets you make restaurant-quality pizza at home. Or, use this perfect add-on — your grill!
Have a build-your-own pizza night. I can assure you all the neighborhood kids will be at your house!
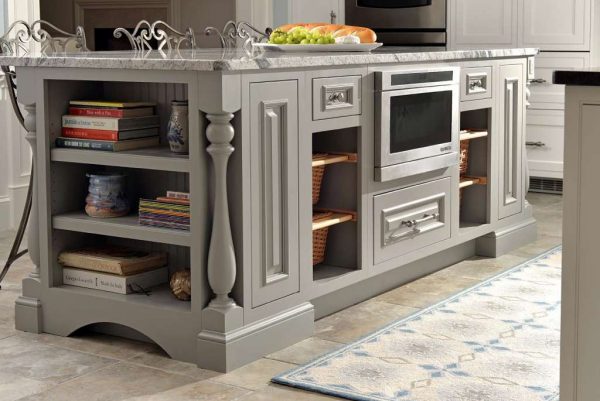
Microwave drawer: Time to take down the microwave from the top of the stove and move it to under the counter. There are a few companies like Sharp and Thermador that have fantastic models. We usually install those in the island, creating easy access for kids to warm up snacks and popcorn without additional assistance or climbing over stoves. And if you don’t want little hands playing, they even have a lock feature!
What are your favorite summer hosting ideas? Share your ideas with us in the comments. We would to hear from you.
This is a sponsored post by Anna Gibson, owner of AKG Design Studio and an award-winning, certified kitchen and bathroom designer. AKG Design Studio is a boutique design firm specializing in kitchen, bathroom designs and cabinetry sales. Earlier this week, AKG was honored with a first-place award for Best Kitchen Design Firm in Virginia Living’s Best of Virginia 2017 edition. Contact Anna at 571-989-2541 or [email protected], and follow her work on Houzz; Pinterest; Facebook and Twitter.
Dar and Diane moved to Reston from the far-away land of Maryland, looking for a property that would fit their budget but also leave them room to bring in their own design flair and fit their lifestyle.
They found this 1972 Reston Contemporary design, by the renowned architect Kenneth L. Bonner, who left his mark on South Reston by combining elements of natural sunlight, preserving trees, use of stone and wood inside and outside the house. Forty-four years later, the original design was no longer functional and needed some help. While big living spaces with small and enclosed kitchens were the “in” things at the time, they no longer fit in with the “super kitchens” lifestyle of today.
On the agenda was creating a layout that would fit Dar and Diane’s lifestyle. As an active young couple, the homeowners love to entertain their friends in various settings, from cocktail parties to barbecues, while on a daily basis keeping with a healthy lifestyle of home cooking and working out. We needed to provide plenty of storage space for kitchen gadgets, prep space and open flow to allow them to host their gatherings.
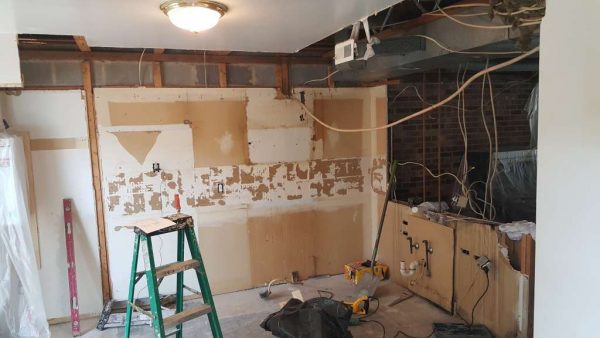
The problem: The kitchen was small and enclosed in a box with very little countertop space. If one person was washing dishes, the other couldn’t cook. There was not enough storage, the fridge was small and blocking the light from the patio. Two very small doors were the only access to the kitchen, cutting it off from the rest of the house flow.
The solution: The first item we investigated was removing the soffit that was weighing down on the space, not only bulky but also reducing possible storage space. The second was opening the wall between the dining room and the kitchen.
The good news was that the wall was not load-bearing. Bad news — we had some pipes that needed relocation. On the soffit front, we had even better news — there was plenty of space between the main floor and the second floor to push the HVAC system up, up and away!
Starting on the outside, we took unused closet space from the hallway to create the perfect spot for the fridge — close enough to the prep areas, yet out of the way. Moving the fridge not only allowed us to create the perfect pantry area, but we could now accommodate a much larger fridge and it no longer blocked the sun from the patio.
With those gone, we needed additional space on the main wall, so we could move the stove away from the corner. The large water heater was converted to a modern wall-mounted electric heater, and the wall was moved while still leaving enough room for the utilities and a few brooms.
Now it was time to put the room back together!
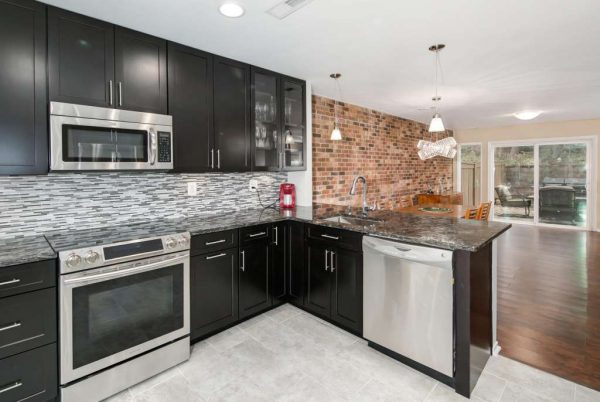
With the soffit gone, we now managed to accommodate 42-inch-high cabinets, adding storage and a sense of height to the kitchen. With the wall gone, we now have a beautiful peninsula that is a great breakfast bar but also perfect for hosting, providing a space for a great party spread.
With the stove now moved to its new location, both homeowners can work in the kitchen together. Recessed and pendants above the peninsula brought design elements and extra light to the space. A glass cabinet was added at the end of the row to break up the cabinets and allow a softer transition to the brick wall and showcase the beautiful crystal collocation of the homeowners. In the end, it created an open space beautiful and functional for the homeowners to enjoy for years to come.
What are the problems in your kitchen? Share them with us and post some pictures!
This is a sponsored post by Anna Gibson, owner of AKG Design Studio and an award-winning, certified kitchen and bathroom designer. AKG Design Studio is a boutique design firm specializing in kitchen, bathroom designs and cabinetry sales. Earlier this week, AKG was honored with a first-place award for Best Kitchen Design Firm in Virginia Living’s Best of Virginia 2017 edition. Contact Anna at 571-989-2541 or [email protected], and follow her work on Houzz; Pinterest; Facebook and Twitter.
Like fine wine and cheese, pairing countertops and tile is an art of mix and match!
But which comes first? The chicken or the egg — I mean, the countertop or the backsplash?
While most homeowners are set on their cabinets style and colors, things get a little dicey when it comes to selecting countertops and backsplash. It seems the possibilities are endless and there are insane amount of combinations and materials.
First things first, let’s have a quick look at the counters and backsplash options (really fast!)
Countertop: If you think counter, the first thing that comes to mind is granite. Yes, granite is fantastic but there are some many other options out there — wood (butcher blocks), stainless steel, concrete, recycled glass, marble, quartz, manmade quartz, Formica, Corian, and did I say recycled-paper countertops? Yes, it’s a thing!
No matter what your life style, design taste or budget, there is a counter top for you.
Backsplash: The word “tile” became so broad in recent years that we no longer just talk about ceramic. Tiles for backsplash are made from porcelain, glass, recycled glass, stainless steel, salvage wood, wallpaper (yes, it’s making a big comeback!), mirror, concrete and much more. I think you get the point! If there is a material out there, it can be made into backsplash.
So how do you pair the two? Here are four ways to choose:
Pick the countertop first: Since you can’t function without a countertop (backsplash can always wait), focus on the counters first. Consider the durability of the stone compared to your lifestyle — how often do you cook, and what other activities are taking place on the counters? After deciding on function, figure out form. Do you like big veins or clean lines? Which pattern will work with your overall design style? No matter what, after collecting a lot (we know you did!) of small samples, make sure to visit the fabricators to see the full slab, so you can see all the variations of the piece.
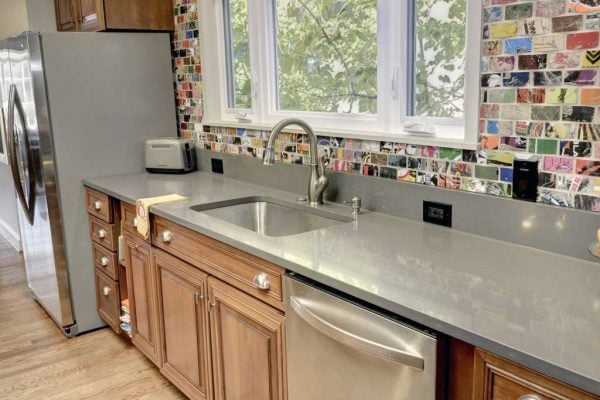
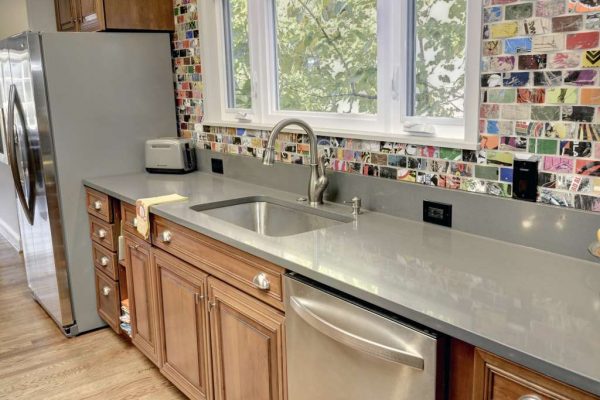
Pick the tile first: After running around looking for cabinets and pinning ideas galore, you know that this tile is your must-have! This is the pop of color that you need in your life, or the statement piece for your kitchen. In the case of the customer in the photo below, they fell in love with this recycled skateboard backsplash, which made the selections for the countertops revolve around the fantastic colors of the skateboard. They narrowed it down to quartz, to have a muted countertop that let the backsplash shine.
Pick the same materials: Tile countertop is an option most people avoid it, preferring not to have grout lines on the counter. However, you can run your solid surface up to the cabinets. You will no longer need to match another material and it works for a large or a smaller space alike. You can run it all the way to the cabinets, or save some cost and just go with 4 inches high and paint the rest.
Phone a friend: Still not sure what will work best for you project? Here is your last option: Hire a pro! If you just can’t make a decision to save your life, are having hard time seeing the full picture, or are just lost between slabs of countertops, it is best to hire a designer to help you chop down the selections, offer pairings that work and give you your weekends back!
Tell us: Love your countertop and backsplash combination? Please post a photo in the comments section below and share the details.
One of the top questions most of my clients ask on our first meeting–drum roll, I know you will be surprised!–is, “How much this is going to cost?” or, “Can you tell me how tall a tree will be full-grown? Well, it depends!
So it is with remodeling projects and kitchens in particular. There is no set standard for size or options for kitchens. Even in a condo building you will most likely to see at least six different versions of layouts, and that is just from the initial built. There are too many options, components and sometimes unknowns that make every kitchen unique.
One of the items that you will need to take under consideration is location. It most likely makes no financial sense to install builder-grade cabinets and appliances in a high-end neighborhood, or vice-versa. You will not get a return on your investment if you place all Sub Zero and Wolf appliances in a $300,000 townhouse.
You will also need to consider if you are planning to remove walls, any major changes to the layout and such that will affect your cost.
Let’s look at these four kitchen projects, starting from the lower and going to the high end.
#1 The Face Lift
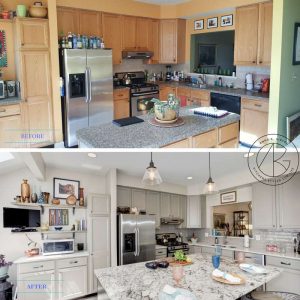 In this Alexandria project, the homeowner wanted to update the kitchen but not change the cabinets. We did change the cabinets for the island since it was too small and she wanted to add a wine cooler and a spot for the trash. We kept the appliances, the cabinets got painted, and we added new flooring, counter tops, hardware and lighting. A facelift can stretch your budget if your cabinets are in good condition and you love your layout. Such a project will run $15,000 to $20,000 based on the size of the kitchen.
This is a sponsored post by Anna Gibson, owner of AKG Design Studio and an award-winning, certified kitchen and bathroom designer. AKG Design Studio is a boutique design firm specializing in kitchen, bathroom designs and cabinetry sales. Contact her at 571-989-2541 or [email protected], and follow her work on Houzz; Pinterest; Facebook and Twitter.
This is part two of the history of the kitchen. (See Part 1 here.) The last 100 years have led us to what we have now.
Early 1900s — Ergonomics!
In 1899, the Hoosier Manufacturing Company introduced a free-standing kitchen storage piece, known as the Hoosier Cabinet. Until then, there was no storage in the kitchen and cabinets were built at home as needed.
The unit included space-saving features like upper and lower cabinets, in-cabinet storage spaces for things like flour, sugar and spices, it even featured a pullout work surface! Although the Hoosier Cabinet wasn’t large, it filled the storage void and made working in the kitchen much more efficient.
In the early 1900s, gas became the preferred source of heat that allowed ovens to become smaller and lighter. According to Wikipedia, “The evolution of the kitchen is linked to the invention of the cooking range or stove and the development of water infrastructure capable of supplying running water to private homes.” The industrial revolution brought inventions, cheaper prices, and new ways of thinking about economic and ergonomic efficiency.
Right after the Hoosier kitchen popped up, in 1926 an Austrian architect named Margarete Schütte-Lihotzky create the Frankfurt kitchen, creating in effect the first fitted modern kitchen as we know it today. Base cabinets, wall cabinets, work surface and appliances fit into the space.
The Mid-century Home style, or the Roaring ’40s
The art deco was influencing everything from fashion to vacuum cleaners to the kitchen. The Frankfurt kitchen has taken over the world and the main stream layout and function. Combined with art deco, we got the first highly designed kitchen!
Where in the past kitchens were only a place of utility, with no character, the art deco took over and introduced many of the design elements that we see today like bold geometric lines, strong colors of the Fauvism movement and fine craftsmanship. Homeowners were inspired to take down walls that once enclosed the kitchen in a box, to open spaces for entertaining.
Pre-manufactured modules, using mass-manufacturing techniques developed during World War II, brought down the cost of kitchens, bringing those design options to most households in the US. And, of course, radar technology brought us the first microwave in 1946.
The Feminism Era (’60s-’70s)
Not surprising, but as the feminist movement was growing during the ’60s and as more women joined the workforce, more time-saving appliances took to the market. We got the first coffee machine in 1952 and the holy food processors in 1960, the Starmix MX3. (You can still find some on the original versions floating around on eBay if the KitchenAid is too fancy for you!)
The heavy colors of yellow and gold are a common thread from the ’50 into the ’70s. Appliances are the same color as the cabinets — how about an avocado green fridge and linoleum floor to match? The cabinet doors are flat and clean line, taken over by mix of bright colors. Microwave sales skyrocket and TV dinners a hit on the grocery shelves — from breakfast to dessert they offered all possible varieties.
Kitchens are fun, functional and full of color!
The ’80s: From Kitchen to Cool
We love the music, but the fashion sense left a lot to be desired!
Yes the avocado green left the kitchen and made space for lighter colors, and lots of oak! The kitchen now has various styles, from country to ultra-modern. (Think Griswolds vs. the neighbors across the street.) The beloved work space, the island, was introduced by designer Susan Zises Green in 1985. It was the biggest change in layout since Frankfurt kitchen.
It is in the ’80s that kitchen becomes the heart of the home! Not only video stars were made, but we are also introduced to celebrity cooks on TV who push the design to kitchens that equipped with more and more “show-off” items to guests, open to the living spaces and providing areas for home work, display decorative items and social spaces.
Today’s kitchens are still very similar to the original Frankfurt kitchen, yet the social and technological changes in the past 100 years influenced the function, size and form. Kitchens today are the grand rooms of the past, creating “super kitchens,” the hub of the house and family life.
This is a sponsored post by Anna Gibson, owner of AKG Design Studio and an award-winning, certified kitchen and bathroom designer. AKG Design Studio is a boutique design firm specializing in kitchen, bathroom designs and cabinetry sales. Contact her at 571-989-2541 or [email protected], and follow her work on Houzz; Pinterest; Facebook and Twitter.
After a fun conversion last night at the Lake Anne Brew House, I decided to write today’s post about the history of the kitchen!
Why the kitchen? Because everyone always ends up in the kitchen.
These days, the kitchen is the heart of the home. It’s where we cook together, host guests and conduct plenty of other activities. Our kitchens are now super kitchens, with multi-functions that flow in and out the rest of the house.
This was not always the case. Historically, kitchens were not the space where people gathered, unless they worked there. The rich didn’t spend their money to make it attractive since they didn’t bring guests into the kitchen. Kitchens were places of utilitarian work — people came into the kitchen to cook or to patch something from the cook. They were small spaces, busy, most days too hot, smelly, noisy and very smoky.
Cooking was essentially done over an open fire within a one-room home or within the great hall of a larger structure. All manner of life revolved around the cooking area, which was the primary source of heat, light and safety.
With the invention of the chimney around 1185 AD, homes started to divide into additional rooms — still getting heat from the kitchen’s fireplace, but with less soot and smoke issues. The location of the kitchen in the house was based on economical possibilities. The upper class, who could afford fireplaces, would situate the kitchen as far away from the dining room as possible to avoid all the commotion. The middle to lower class would have the kitchen in the middle of the house to provide a source of heat.
Kitchens in the 18th and 19th Centuries
Economic and political changes had a major influence on the design and function of the kitchen.
The 18th and 19th centuries saw an influence of the French style of cooking, with elaborate dishes, formal table settings and strict etiquette. Explorers traveled the world and brought home exotic foods and spices.
Now there was a need for more servants to cook and clean all those dishes. Now the kitchen grew larger to accommodate all the necessary food, prep area and extreme amount of dishes! Yes, they did have big tables in the kitchen, but those were use as a prep area and for the servants’ meals.
End of the 19th Century — Progress
The industrial revolution impacted the world, including the kitchen. It brought the use of coal, then gas; the invention of cast iron; electricity; and plumbed water adding to the functionality of the kitchen, changing the look of the kitchen with it.
According to Old House Online, “the growth of American coal and iron mining in the 1820s made cast iron the wonder material of the 19th century and led to a prolific industry in making stoves for cooking as well as heating.”
However, kitchens were still away from the center of the house — in basements and the back of the house.
Make sure to check back in two weeks for Part 2 of the history of the kitchen.
This is a sponsored post by Anna Gibson, owner of AKG Design Studio and an award-winning, certified kitchen and bathroom designer. AKG Design Studio is a boutique design firm specializing in kitchen, bathroom designs and cabinetry sales. Contact her at 571-989-2541 or [email protected], and follow her work on Houzz; Pinterest; Facebook and Twitter.
A quick and easy way to update your kitchen without a big expense is to update your backsplash.
A backsplash is like that one piece of jewelry that gives every outfit a final touch. It adds a flair of personality and a great layer of design to your kitchen. Since tile install can be an easy DIY project, the backsplash can be replaced more often than you think and ensure your kitchen is as fashion forward as you are. Just a quick facelift of the backsplash (and maybe the hardware while you are at it) and you have an updated kitchen.
While selecting backsplash, the latest “safe” trend is the classic white subway tile. I challenge you to show your own personality in the backsplash and think about what statement you want to bring to your kitchen. Maybe you need some more bling in your life or simple elegance, or something to add a more sophisticated look with a bright twist. The options are endless.
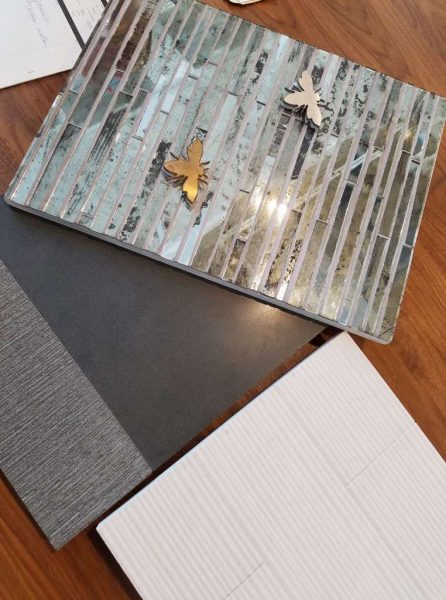
If you must use a rectangle/subway tile, look at creative ways to lay it out. Play with the layouts to create a look that matches your kitchen style — herringbone for a traditional look or stacked straight for a contemporary look. Find a different texture like crackled glass or a handmade look.
The tile industry has finally started thinking outside of the 4×4, and geometric shapes are popping up everywhere from penny round, honeycomb arabesque and puzzles! Look at this geomantic pearl.
Laser-cut tiles are tiles that are cut by lasers to produce elaborate designs that are pieced together like a puzzle. Many of them are made from marble, so the price maybe steep. You may want to look at ceramic options of geometric tile that can give you the same effect for less cost.
Many companies like Fireclay from California now offer custom tile designs in affordable prices! You can pick your pattern and your own color or four, creating one-of-a-kind custom-designed tiles just for you.
Beyond porcelain or glass tile, there are plenty of other materials that can be used for your backsplash from wood, wallpaper — yes, it’s making a smashing comeback! — chalkboard paint and different recycled materials, such as those skateboards we used in this Arlington project.
Maybe you can’t decide on tile or are looking for a cleaner look with easy maintenance. Think about running your countertop up as a backsplash as well. This will not be as cost-effective or easy to replace, but it sure creates a stunning backdrop to your kitchen and a conversation piece.
Whichever product you end up going with, make sure it vibes with the countertop, since your backsplash will always be right up against the counter. If you are going with a busy countertop such as granites tend to be, go with a solid backsplash color but add pattern. But if you go with a solid color counter as quartz, go with pattern and color to balance the blank canvas of the top.
No matter what, remember to have fun, be bold and show your style!
This is a sponsored post by Anna Gibson, owner of AKG Design Studio and an award-winning, certified kitchen and bathroom designer. AKG Design Studio is a boutique design firm specializing in kitchen, bathroom designs and cabinetry sales. Contact her at 571-989-2541 or [email protected], and follow her work on Houzz; Pinterest; Facebook and Twitter.
Spring is right around the corner, and most people take time to do some extra cleanup and organize their homes, inside and out. Here are a few tips on how best to organize your kitchen.
STEP ONE: First things first, take everything out of the cabinets! Crazy, I know, but this mayhem is in the name of order! By pulling everything out you can inventory what you have.
Do you really need 15 cookie sheets? You know some of them may have seen better days, time to toss! How about boxed food that is about to expire or you will never eat and it’s just collecting dust and taking space? Those are great items to donate to the local shelter.
Don’t be scared to toss things that you do not use. Most kitchens are short on storage, so there is no point in holding onto your dishes from college or an extra pizza cutter.
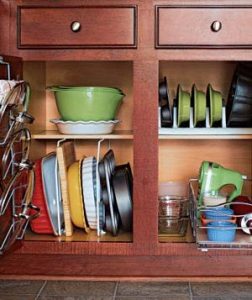 STEP TWO: Group all the items by their use and then frequency. Sort and group all the baking goods together, all the baking sheets, glasses and so on. Now, sort them by how often you use then. If you have more than one set of glasses but only use one on a daily basis, keep that one aside.
STEP THREE: Before you jump into putting everything back, make sure to look at your work space and where everything is located. Spices are best by the stove or close to where you do most of you prep. Serving dishes should be away from your cooking zone and handy to all house members without bumping into the cook, so is the silverware and glassware.
Think about and maximize your efficiency in the kitchen by minimizing the number of steps you need to take. There is no point storing your cooking utensils on the side of the island if your main prep area is by the stove.
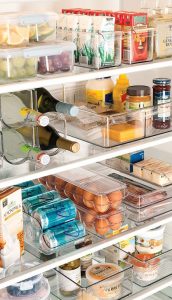 STEP FOUR: Use clean containers to group items together and store them upright so you can see what’s in them. Take an extra step to label them, if it’s unclear what’s inside. You can use larger containers to store and organize plastic containers and lids. Also, use the same system to organize your fridge!
STEP FIVE: Now you can start putting things back.
I like moving from the top down. Place all the items that you rarely use in the top cabinets, where they are hard to reach and you don’t need to get to them every day, then work your way down to the items that you use every day and place them on the two bottom shelves of the wall cabinets. Use the bottom cabinets for the bigger items, such as pots and pans.
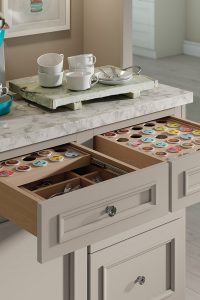 Create your own zones, such as a coffee and tea station, but storing the coffee mugs above the coffee machine and all the supplies on the shelf above or the drawer below. If you are remodeling, consider great accessories such as this one for your k-cups. Some other rollouts can be added — check out Rev-a shelf for great ideas to transform the inside of your cabinets.
For more ideas and gadgets checkout out Pinterest board: Maximizing kitchen storage with accessories.
Have your own fun ideas? Share with us!
This is a sponsored post by Anna Gibson, owner of AKG Design Studio and an award-winning, certified kitchen and bathroom designer. AKG Design Studio is a boutique design firm specializing in kitchen, bathroom designs and cabinetry sales. Contact her at 571-989-2541 or [email protected], and follow her work on Houzz; Pinterest; Facebook and Twitter.
When you think about cabinets you mostly think that they are built out of wood, and that’s true for the most part.
But most cabinets are not built from solid wood. There are other materials that go into the construction of cabinets. Most are wood-based, but others are not.
SOLID WOOD
Just as the term implies, it’s solid piece of wood, all the way through. The only variation might be panels that are pieces of solid wood joined together to create a larger slab. Those are usually used only on the framing and doors of the cabinets. Most cabinet lines will only use solid wood for the face frame, and better cabinet line will use it for drawer boxes and rollouts.
PLYWOOD
This is an engineered wood product, one that’s probably most familiar to most. It’s made up of thin wood layers of wood that are glued together in a sandwich form. This construction gives the board more stability.
Most custom and high-end cabinet lines use plywood for all their parts, such as the box and shelving. In mid-level lines, plywood is usually available as an upgrade, which most customers opt to get to provide longevity to their kitchens.
PARTICLE BOARD
This is engineered wood that is made from wood chips and particles that are combined with an adhesive and fused together into boards. Most stock lines use particle board as the starting point for their construction level. Particle board is cheaper but also absorbs water very quickly and then disintegrates the particles, so you need to very careful about placing cabinets made from particle board in wet spaces.
MEDIUM DENSITY FIBERBOARD (MDF)
This is another engineered wood product that’s made up of wood fibers. MDF has a finer texture than particle board and is denser and heavier than particle board. It’s used for cabinet doors, shelves and cabinet boxes.
Many pre-fabricated low-end vanity cabinets are made from MDF. It will mostly be used for painted cabinets, as it has no wood grain look to it, but it is easy to paint.
Now that we know about the construction options, the level of customization available and materials used in building the cabinets, how do you spot a great cabinet?
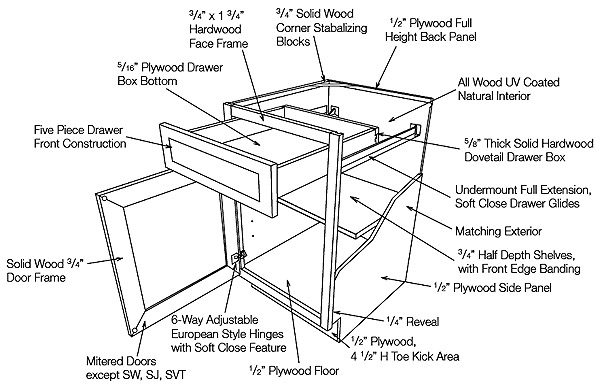
Top-quality kitchen cabinets are made like good furniture, so look for furniture-type construction of the box — 3/4-inch solid hardwood front frame (for framed cabinets); thicker, rather than thinner; and box construction of at least 1/2-inch plywood.
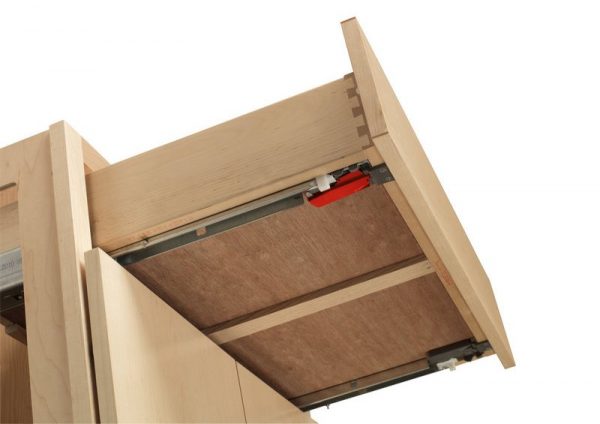
The shelving should be made of plywood as well for extra stability. The drawer boxes and rollouts should be solid wood with undermount glides. Those will be easy to spot, as they will be built with dovetail corner construction and not glued or stapled. The glides will be mounted under the drawer/ rollout for maximum support, and most are built for at least 100 pounds of weight load.
Lastly, ask about the finishing process. Cabinet manufactures have different ways to adhere the finish to the cabinets and you want it to last long.
Regardless of who you buy your cabinets from, make sure you understand what their warranty covers and for how long. Many of the high-end cabinet lines will offer lifetime warranty on the cabinets finish and parts.
If you are still not sure which cabinet is right for you, feel free to contact us or leave a comment below. We would love to help!
This is a sponsored post by Anna Gibson, owner of AKG Design Studio and an award-winning, certified kitchen and bathroom designer. AKG Design Studio is a boutique design firm specializing in kitchen, bathroom designs and cabinetry sales. Contact her at 571-989-2541 or [email protected], and follow her work on Houzz; Pinterest; Facebook and Twitter.
Last time we spoke about the big, overall question to ask yourself when selecting cabinets. Today, we are going to dive into the details, the ABCs of cabinets.
It seems to be easy to just pick a door style and color, but why are there so many cabinet options? Shades of gray and versions of shaker. Are they all created equal? Can you create your space from almost each cabinet line out there? Sure! But there are few things you should know before investing new cabinets.
CABINET TYPE
As you start shopping around, you will notice three different level of cabinets — stock, semi-custom and custom. Let’s look at the different options that each has to offer.
Stock cabinets provide a quick and cost-effective way to give a kitchen a fresh new look. The cabinets are built in common cabinet sizes and are available in a limited variety of door styles, colors and finishes.
A stock brand such as Aristokraft can offer style, selection and value, along with speedy delivery, to keep your remodeling project on time and bring your vision to life. If you are looking to sell or flip, those cabinets are a good value.
Semi-custom cabinets are available in more styles, features and options than stock cabinets, allowing you to create a personalized look for your kitchen at less expense than custom cabinets. Built to order and available at cabinet dealers, semi-custom cabinets are generally delivered within four to eight weeks. Semi-custom cabinets give you the options to modify cabinet size in limited capacity, but with all the added features this is the prefect cabinet grade for a mid-range remodel.
Two of the semi-custom lines we carry are Kemper and Waypoint. They each offer different door style, price point and features.
Custom kitchen cabinets offer the widest range of wood types, finishing options, construction platforms and modifications. Cabinet lines such as Decora and Candlelight offer cabinets that are built to spec and can be modified based on your design. If you can draw it, they can built it.
Working with custom lines offers greater flexibility in the design as far as space planning and style.
FRAMED AND FRAMELESS CONSTRUCTION
The two most popular cabinet construction types are framed and frameless. Those vary by manufacture and areas of the world. While frameless is very popular in Canada and Europe, the framed construction is mostly popular in the U.S.
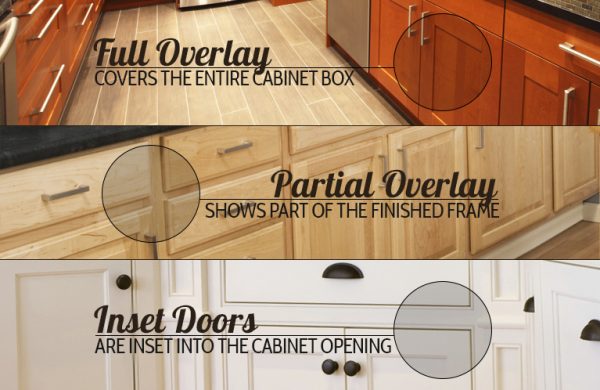
Framed cabinets incorporate a wood “frame” around the front outer edge of the cabinet box. That’s in contrast to a frameless cabinet, which doesn’t have this feature. The framed construction is considered to be a bit more traditional and has few overlay options for the door application
Partial or traditional overlay — As its name suggests, covers only part of the cabinet and reveals the cabinet frame.
Full overlay — The updated style, cabinet doors cover the whole frame for a furniture look.
Inset door — The doors are inset into the frame. This is a fantastic look for modern farm style or an upscale traditional look.
Frameless — These cabinets tend to be more contemporary. The doors must cover the whole cabinets front since there is no frame. The door styles on frameless cabinets tend to be flat and slick-looking; also, some cabinet lines will offer more traditional door styles. Your contractor will need to know that you selected frameless cabinets and may charge extra labor cost, as those need extra work on leveling.
Next time, we will review the different constitution features that each cabinet grade has to offer, and how to spot a great cabinet!
Got questions? Post them below! We would love to hear from you!


